
Engineering Records · 3D Printing & CAD Prototyping
Designing a Parametric TPU Bracelet System
How a simple flexible bracelet turned into an ongoing CAD exercise involving parameters, sizing, curved geometry, surface patterns, TPU, and batch printing.
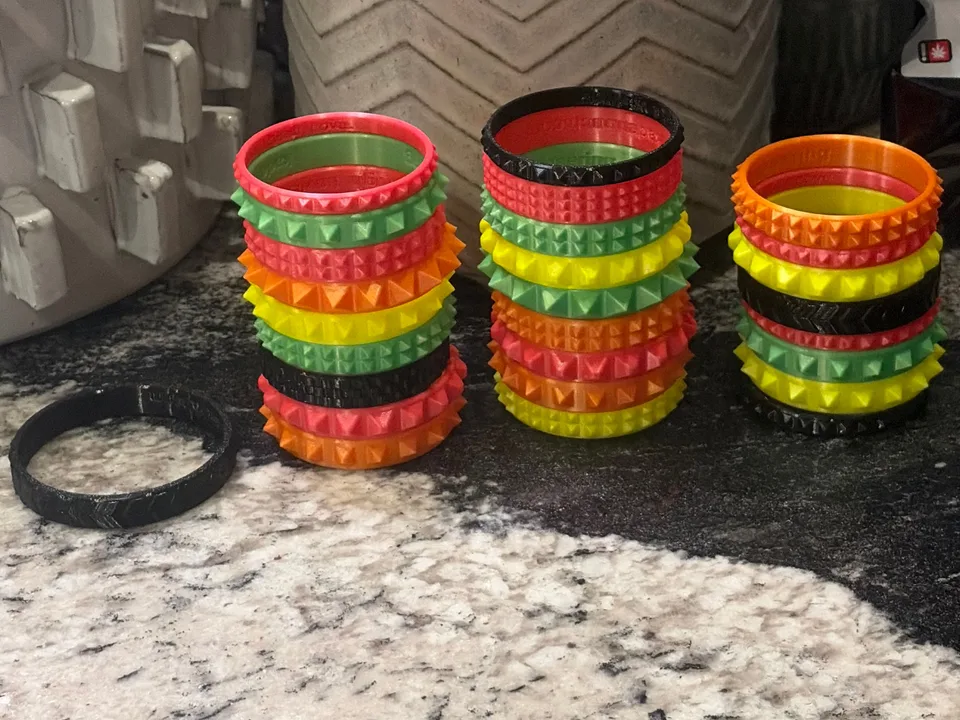
Bracelet Prototypes
Multiple colorful 3D printed flexible bracelets arranged in rows
One of the projects that has pushed me the furthest in Fusion so far started as something pretty simple: making my own flexible bracelets.
The first goal was just to make a band that fit correctly and could have custom text built into it.
That turned into a much bigger CAD exercise.
Starting With a Simple Band
The basic geometry wasn’t especially complicated.
What made it interesting was that I didn’t want to make one bracelet and stop there. I wanted something I could keep changing.
Different wrist sizes needed different dimensions. I wanted to be able to change the text. I wanted different exterior patterns. Eventually I wanted completely different styles built around the same basic idea.
That meant the model needed to become reusable instead of being a one-off part.
Making the Design Parametric
I started moving the important dimensions into Fusion parameters.
Instead of manually changing sketches and features every time I wanted another size, I could control important measurements from one place and let the rest of the model update around them.
That was one of the first times parametric modeling really clicked for me.
It wasn’t just a cleaner way to build the model. It changed what I could do with it afterward.
The bracelet stopped being one finished object and started becoming more like a design system.
Designing Multiple Sizes
Once the basic dimensions were parameterized, I started creating multiple bracelet sizes.
That sounds simple, but scaling a wearable object isn’t necessarily the same thing as just making everything proportionally larger or smaller.
The inside dimensions affect fit. The wall thickness affects flexibility. Exterior patterns need to still look right. Text needs enough room to remain readable.
Each version gave me another physical thing I could compare instead of just guessing from the screen.
Working on a Curved Surface
Text became one of the more frustrating parts of the design.
Putting text on a flat surface is easy.
Putting it around a curved bracelet while keeping it oriented correctly is much less straightforward.
I ended up working with tangent planes, embossing, curved faces, and feature orientation to get text positioned the way I wanted.
There were several points where the model technically worked but the result was facing sideways, wrapping incorrectly, or behaving completely differently than I expected.
Working through those problems taught me a lot more about Fusion than a basic tutorial would have.
Surface Patterns and Variations
Once the base bracelet and text were working, I started experimenting with the outside surface.
I tried small repeated studs, larger geometric features, and other patterns built around the same underlying bracelet.
This is where having the reusable base model started paying off.
Instead of rebuilding the entire bracelet every time I had another idea, I could keep the dimensions that already worked and concentrate on the new feature.
Designing for TPU
TPU changed the problem again.
Unlike the rigid parts I had been printing, the bracelet needed to bend, stretch, and feel comfortable.
The geometry affects how stiff the final bracelet feels. Wall thickness matters. Surface features change the way the part bends. Even small details can look completely different once they become a flexible printed object instead of a CAD model.
TPU also made filament condition and printer settings much more obvious.
Moisture, surface quality, extrusion behavior, and print speed all started mattering more as I tried to get repeatable finished parts.
Moving Toward Batch Printing
Once individual bracelets were printing reliably enough, I started arranging several designs on the same build plate.
That was another small shift in the way I was thinking about the project.
Making one successful print is one problem.
Making several of the same type of object together, reliably, starts introducing another set of questions:
- how tightly can I arrange the parts
- how much material is being used
- how long does the whole batch take
- what happens if one part fails
- and whether the same design behaves consistently across several copies
I’m still learning that side of it, but it has been a useful introduction to thinking beyond one-off prototypes.
What I Learned
This started as one of the simpler things I thought I could design.
Instead, it has made me work through parameters, sizing, curved geometry, embossing, repeated features, flexible materials, print layout, and physical iteration.
More importantly, it gave me a reusable design that I can keep building on instead of a single finished model.
That’s becoming one of the things I like most about CAD.
A good design doesn’t have to be finished when the first version works.